TinyMCE
The new html text editor, replacing the WebEditor. TinyMCE is a third party component that has been integrated in the Smartsite 7 Manager. We are currently using version 4. Vendor documentation is available here.
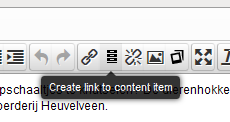
To link a Smartsite item, use the Create link to content item button from the toolbar. This will take the user to the content library to select an item.
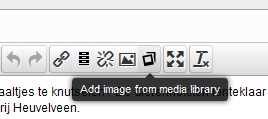
Images from the media library can be added using the button Add image from media library.
The following WebEditor properties will also be used in TinyMCE:
- cust:DocumentCSS
If no DocumentCSS ctfp is defined, the manager will attempt to find the editor css that is set in the rendertemplate that is used for the current contenttype in the default channel. - cust:FormatsXml
- cust:ClassesXml
Smartsite 7.1 and after
Smartsite 7.1 introduces more intricate configuration of the TinyMCE editor. The xml files ../System/TinyMCE/config.xml and ../System/TinyMCE/styleformats.xml now determine which plugins are loaded, which buttons are displayed in the toolbar and which formats are available in the respective formatting dropdowns. The location of these files can be overridden using the ctfps cms:TinyMceConfig and cms:StyleFormats respectively.
If the StyleFormats file is not found, the manager reverts to the Smartsite 7.0 behaviour where the webEditor configuration is used to determine formats. If the TinyMceConfig file is not found, no plugins or toolbar buttons will be loaded.
An example of the config xml
| XML |
|
|---|---|
<?xml version="1.0" encoding="ISO-8859-1" ?> <data xmlns="http://smartsite.nl/namespaces/dataeditor/2.0"> <plugins>advlist, autolink, lists, charmap, print, hr, anchor, pagebreak, visualblocks, visualchars, nonbreaking, directionality, paste, textcolor, fullscreen, image, link, table, code, tabindex</plugins> <toolbar>formatselect,styleselect,bold,italic,|,cut,copy,paste,pastetext,pasteword,|,alignleft,aligncenter,alignright,alignjustify,|,bullist,numlist,|,outdent,indent,|,undo,redo,|,link,addlinkcontentlib,addlinkfileexplorer,unlink,image,addimagemedialib,addimagefileexplorer,|,fullscreen,|,removeformat</toolbar> <blockformats>Paragraph=p;Header 2=h2;Header 3=h3;Header 4=h4;Header 5=h5;Definition term=dt;Definition description=dd;Code=code</blockformats> </data> |
|
Using the StyleFormats xml, specific combinations of elements, classes and attributes can be assigned to specific selections. Let's look at the xml first
| XML |
|
|---|---|
<?xml version="1.0" encoding="ISO-8859-1" ?> <data xmlns="http://smartsite.nl/namespaces/dataeditor/2.0"> <group title="Headers"> <format title="Header 1" format="h1" /> <format title="Header 2" format="h2" /> <format title="Header 3" format="h3" /> <format title="Header 4" format="h4" /> <format title="Header 5" format="h5" /> <format title="Header 6" format="h6" /> </group> <group title="Inline"> <format title="Bold" format="bold" icon="bold" /> <format title="Italic" format="italic" icon="italic" /> <format title="Strikethrough" format="strikethrough" icon="strikethrough" /> <format title="Superscript" format="superscript" icon="superscript" /> <format title="Subscript" format="subscript" icon="subscript" /> <format title="Code" format="code" icon="code" /> </group> <group title="Blocks"> <format title="Paragraph" format="p" /> <format title="Blockquote" format="blockquote" /> <format title="Div" format="div" /> <format title="Pre" format="pre" /> </group> <group title="Alignment"> <format title="Left" icon="alignleft" format="alignleft" /> <format title="Center" icon="aligncenter" format="aligncenter" /> <format title="Right" icon="alignright" format="alignright" /> <format title="Justify" icon="alignjustify" format="alignjustify" /> <format title="Image left" selector="img"> <attributes class="img_left" /> </format> <format title="Image right" selector="img" classes="img_right" /> </group> </data> |
|
The format element defines a format. The title attribute is the caption used in the menu. TinyMCE will attempt to translate these to the users locale. The format attribute determines the html tag to be placed around the selection. The icon attribute determines the icon placed in front of the caption. These icons are added using css for an i tag inside the menu item with the class attribute "mce-ico mce-i-[ICONNAME]".
The selector attribute determines on which selections the format can be applied. The classes attribute sets a class on the selected or created element. The attributes element adds its own attributes to the selected or created element in the editor.
The group element introduces a sub menu in the formatting drop down. If any group element exists, all format elements must be placed inside a group.
Smartsite 7.3 and after
Smartsite 7.3 ships with TinyMce version 4.1.10.
The TinyMce config xml now supports an element "customoptions" which holds a json object to override any default options in the editor initialization.
| XML |
|
|---|---|
<customoptions>{
  toolbar2: "youtube",
  formats: {
            alignleft: { selector: 'p,h1,h2,h3,h4,h5,h6,td,th,div,ul,ol,li,table,img', classes: 'alignleft' },
            aligncenter: { selector: 'p,h1,h2,h3,h4,h5,h6,td,th,div,ul,ol,li,table,img', classes: 'aligncenter' },
            alignright: { selector: 'p,h1,h2,h3,h4,h5,h6,td,th,div,ul,ol,li,table,img', classes: 'alignright' },
            alignjustify: { selector: 'p,h1,h2,h3,h4,h5,h6,td,th,div,ul,ol,li,table,img', classes: 'alignjustify' },
        }
 }</customoptions>
|
|