Generate DataEditor example
In this example, a (custom) DataEditor action is created on the FileTypes table, using the Generate DataEditor wizard.
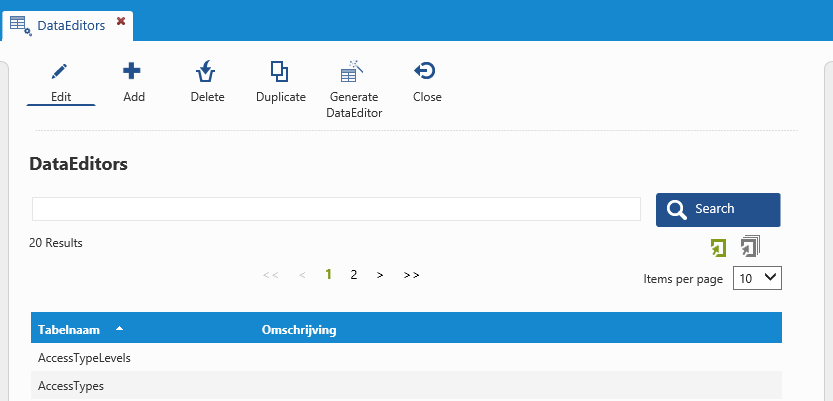
Generate DataEditor
Open the DataEditors Library (System menu) and click the Generate DataEditor button.
Step 1
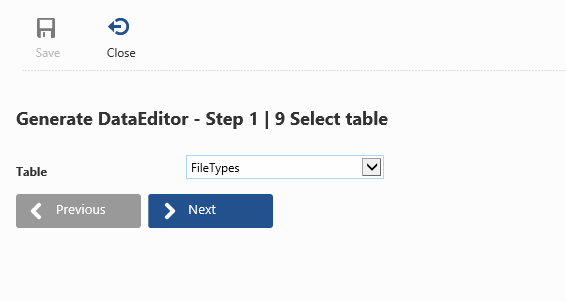
Select the table for which you want to create a DataEditor action. Within this example, the FileTypes table is chosen.
Step 2

Select the fields from the table which need to be included within the metatype.
In other words, select the fields you need to be able to add/edit.
The primary key field needs to be included as well.
Step 3
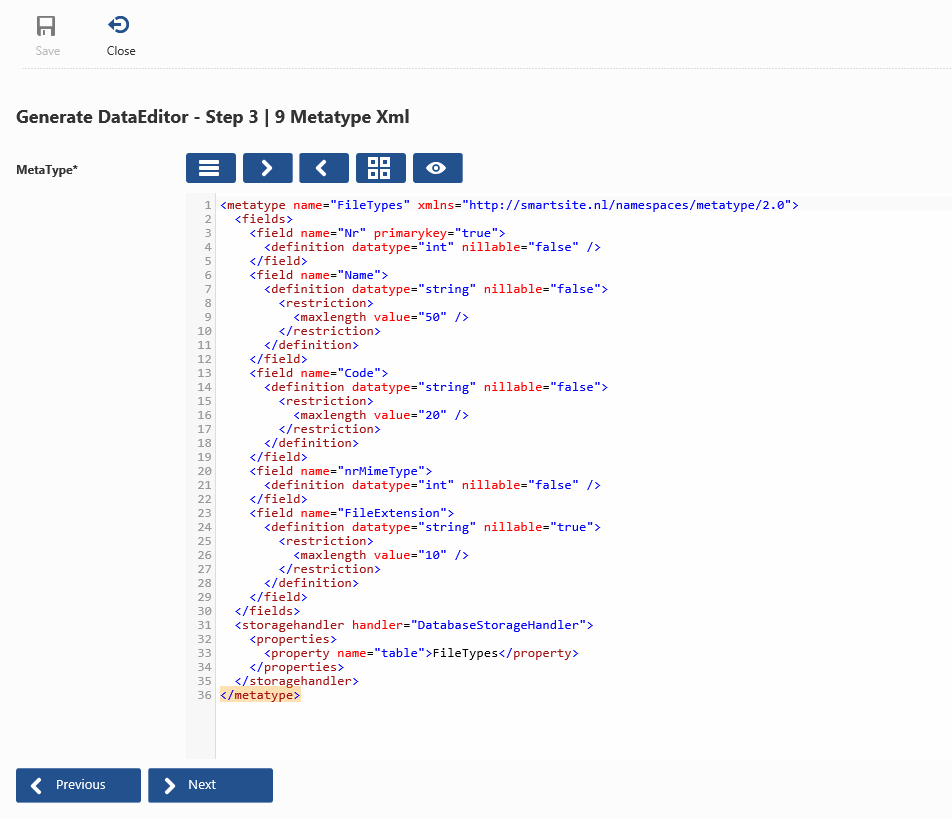
Based on the selected fields within step 3, a preliminary version of the metatype is generated.
It includes which fields will be part of any add/edit operation and for each field, a definition is included describing its datatype, restrictions (if any), etc.
Usually, the metatype needs to be altered, e.g. the field definition for columns which use a foreign key construct are incomplete.
However, for now just click Next, the required changes will be discussed later on.
Step 4
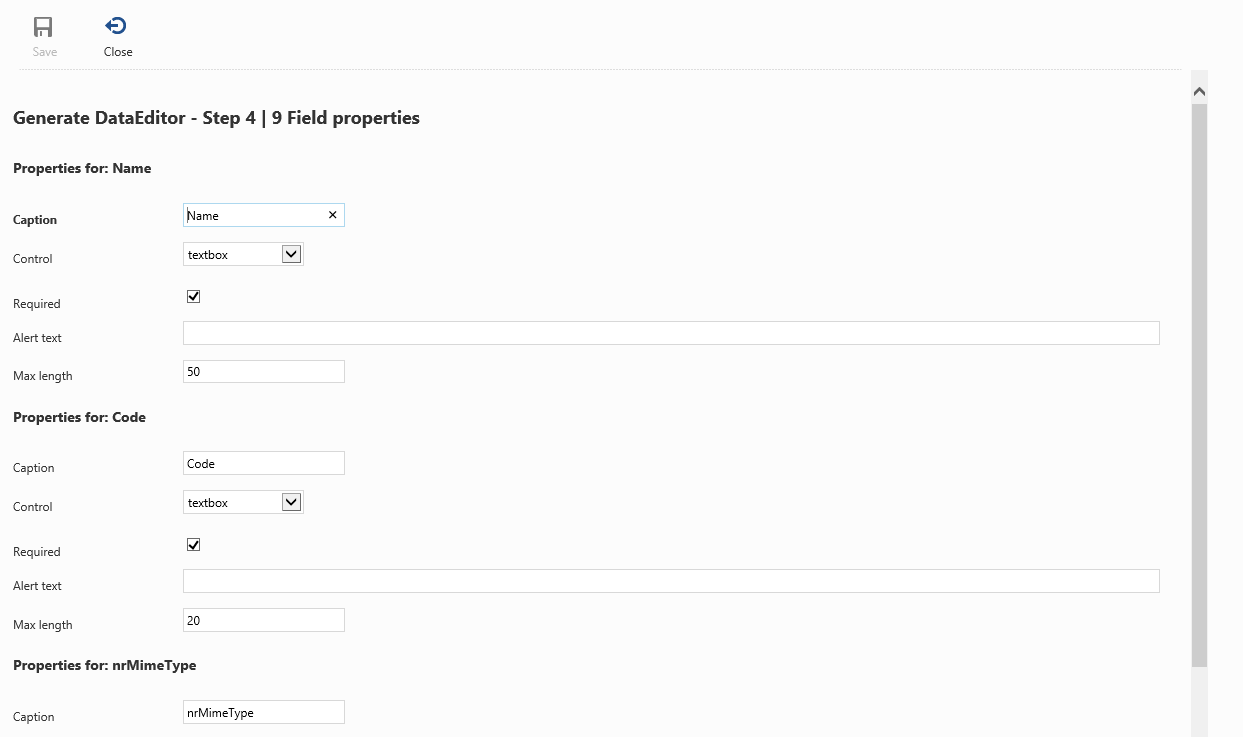
Step 4 is about constructing the DataEditor Xml, which defines the UI.
For each field, select the appropriate control and specify a caption and whether or not the field should be required.
Step 5
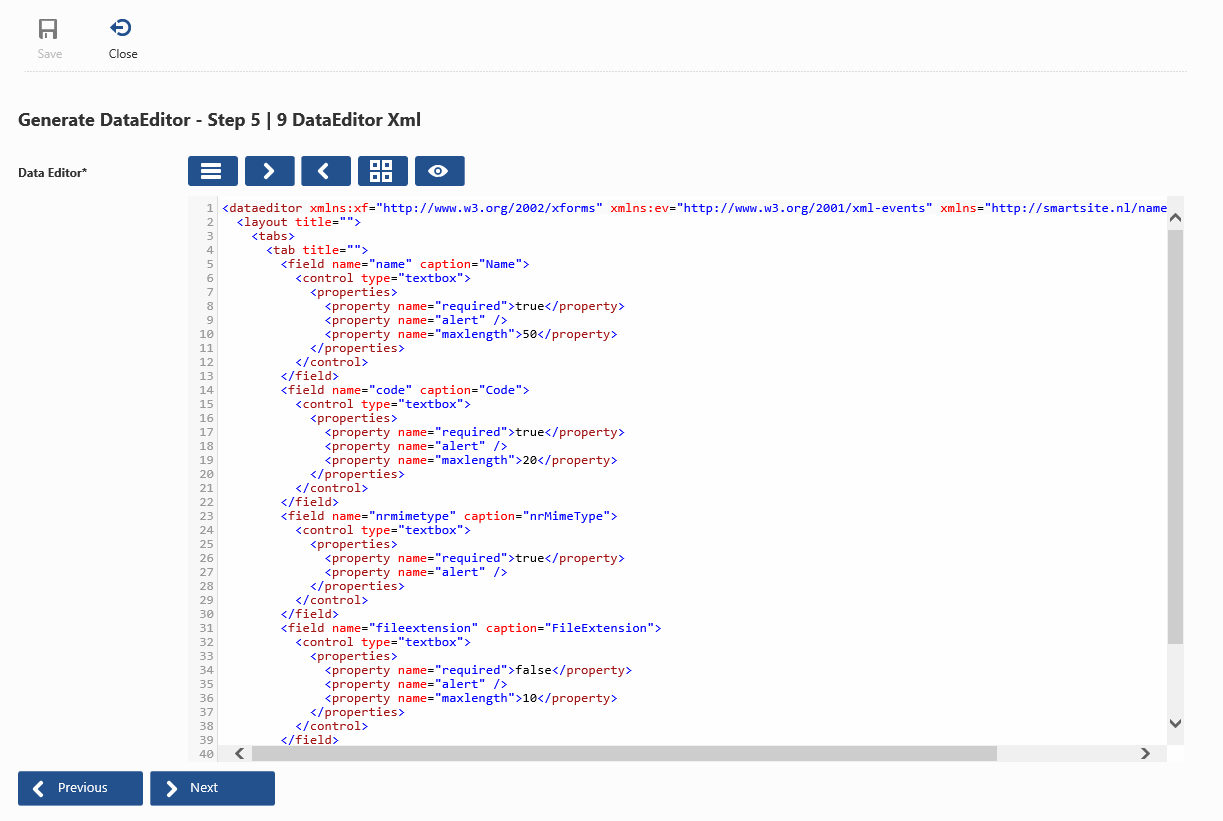
Step 5 shows the generated DataEditor Xml.
The wizard always generates a layout which includes just one tab, but here (or later on) you can add one or more tabs and distribute the fields over these tabs in the order you see fit.
Within this example, we'll just keep the generated xml for now and any changes will be discussed later on.
Step 6
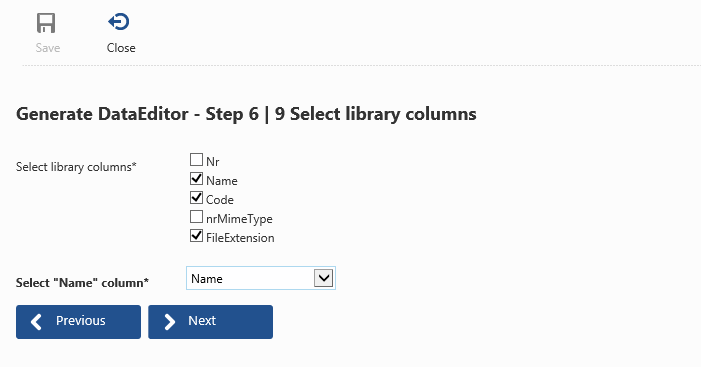
Within step 6, you need to select which columns should be displayed within the library.
Also, you need to specify which column should be used as "name" column.
The name of a record will e.g. be used as tab title when editing an existing record.
Step 7
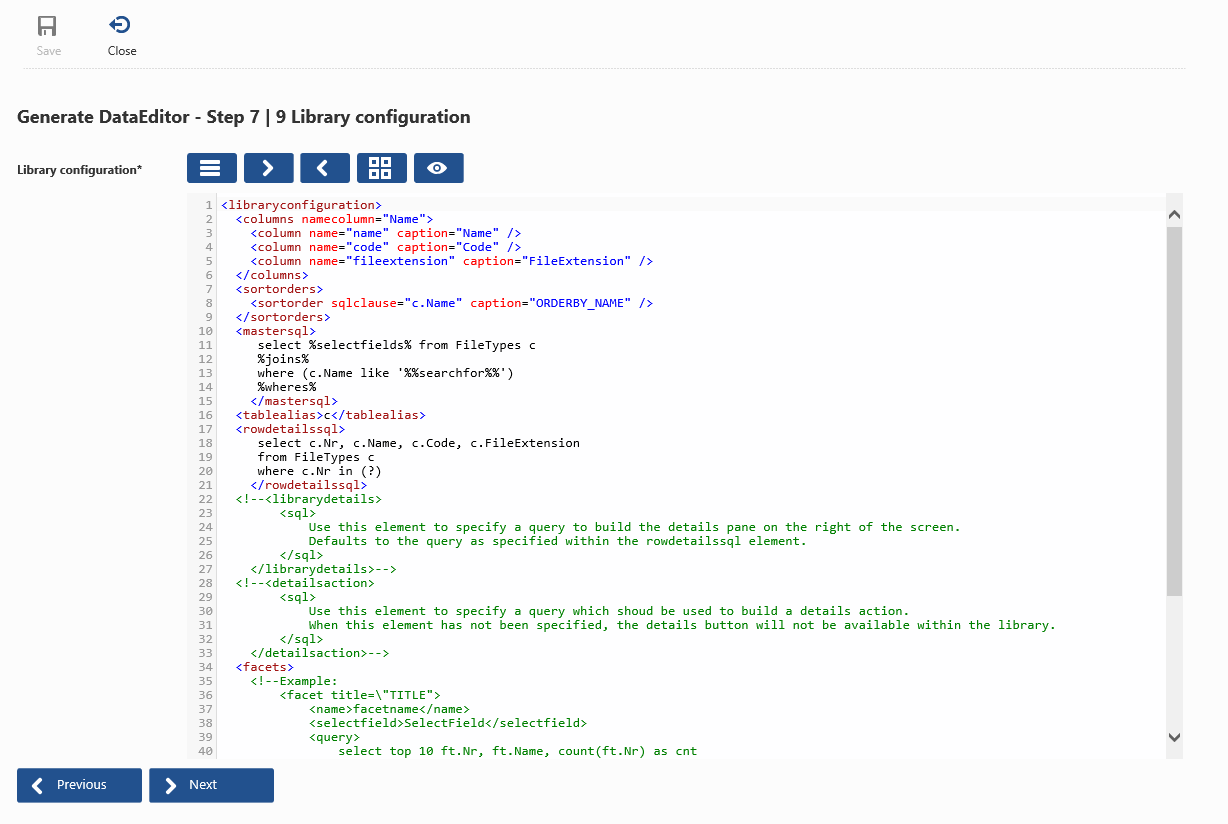
Step 7 shows the generated Library Configuration xml.
This xml defines the several building blocks of the library, in short:
- The columns element defines the columns that will be shown within the library.
- The sortorders element defines one or more sort orders.
- The mastersql element defines the master sql query that will be used to select the primary keys.
- The rowdetailssql element should contain the query to retrieve the row data.
- The facets element defines one or more facets.
Step 8
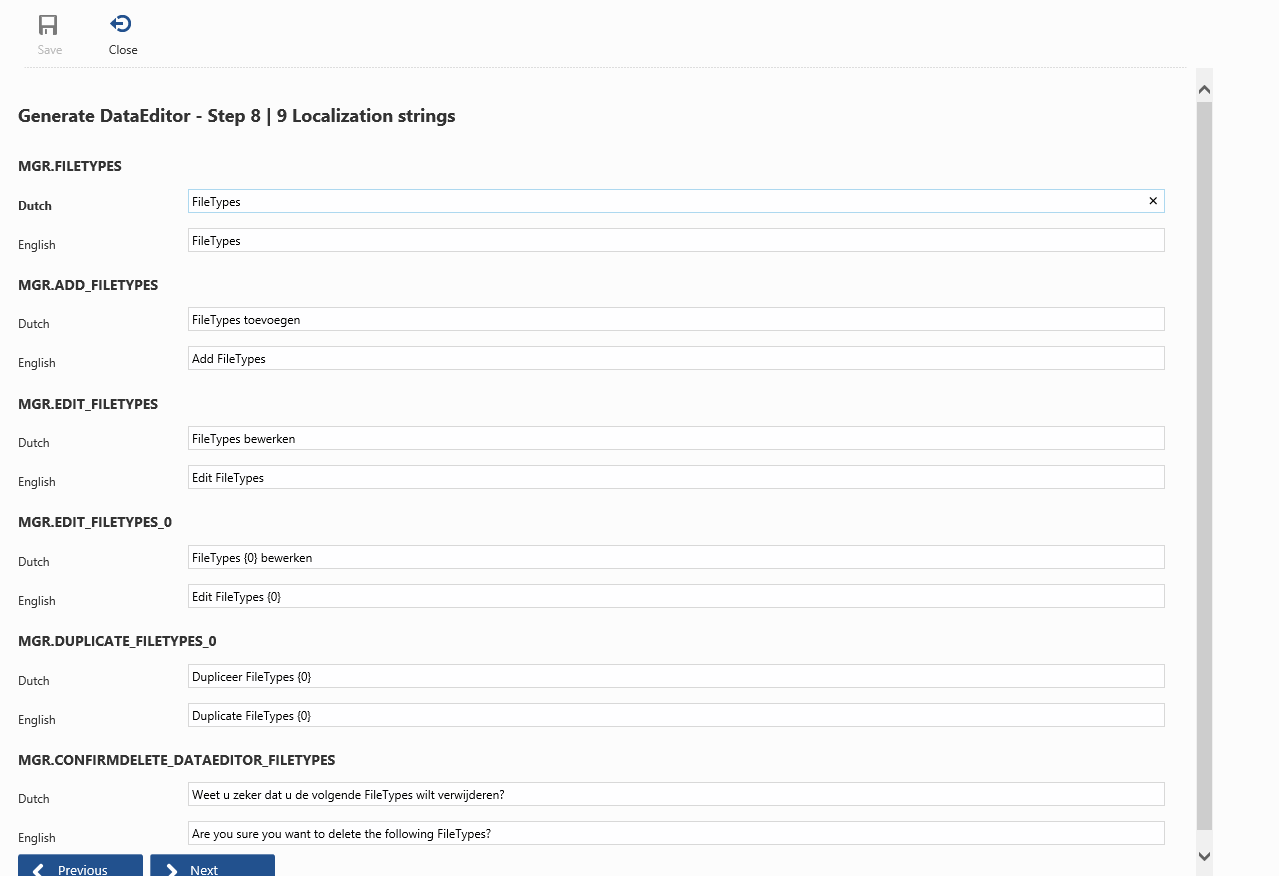
Step 8 contains several localization strings that will be used within the library and the add/edit actions.
Step 9
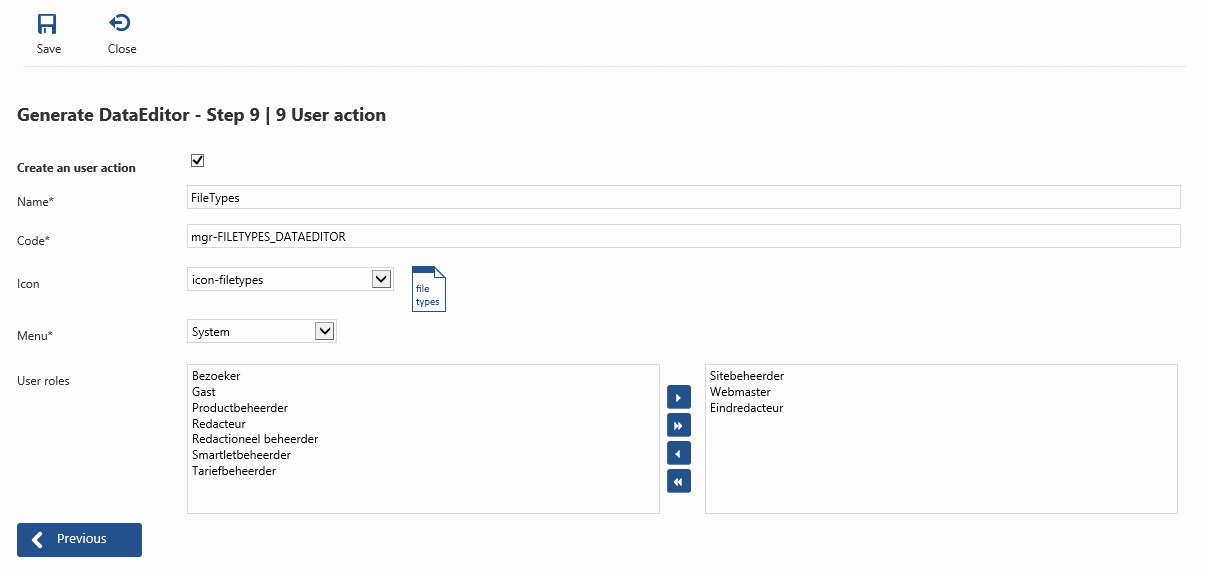
The final step includes creating the user action.
Specify the name and code of the action, select an icon and a menu and select the user roles for which this action should be available.
Click the Save button when finished.
The save operation includes:
- The DataEditor definition will be added to the database, which includes the metatype xml (step 3), dataeditor xml (step 5) and library configuration xml (step 7).
- Localization strings (step 8) will be added to the database.
- The user action is created.
The DataEditor for the selected table is then ready to be used.
However, it's a basic implementation, so in the next articles the DataEditor definition will be altered to reach a more user-friendly level when using this DataEditor.