Styling and Skinning Smartlets
As you know, you can define any Smartlet CSS by adding CSS items to the ClientData folder.
The guidelines prescribe that you always use the following to add CSS rules:
| Smartsite SXML |
|
|---|---|
{smartlet.nameselector()} div.preload {
   display: none;
}
|
|
It is good practice to separate functional from styling css: add fonts, colors, borders etc. to the styling CSS. So, create another CSS item in the ClientData folder with CSS rules that should be styleable for individual sites/subsites.
| Smartsite SXML |
|
|---|---|
{smartlet.nameselector()} {
   color: #fabecc;
}
|
|
Functional CSS should be stored in an item called 'CSS'. Default graphical CSS in an item called 'Skin'.
Implementing a Skin
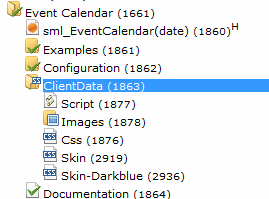
Now, you can simply copy the 'Skin' CSS item, like you can see in the image, and update it.
Let's say we name our skin 'coolblue'. In the CSS, add '.coolblue' directly after the closing parenthesis of the nameselector viper:
| Smartsite SXML |
|
|---|---|
{smartlet.nameselector()}.coolblue {
   color: #eaeaff;
}
|
|
In the Event Calendar Smartlet shown above, the CSS will render as:
| Smartsite SXML |
|
|---|---|
.sml_eventcalendar.coolblue {
   color: #eaeaff;
}
|
|
Using the skin CSS
To use the newly created skin, you will have to tell Smartsite to render the coolblue CSS class. The smartletbox macro will take care of that, but it needs to get the name of the selected skin.
This skin name can be set using a boxskin named argument:
| Smartsite SXML |
|
|---|---|
{sml_eventcalendar(boxskin='coolblue')}
|
|
... or by setting a global page buffer smlConfig_DefaultSkin:
| Smartsite SXML |
|
|---|---|
{buffer.set(smlConfig_DefaultSkin, Page, 'coolblue')}
|
|
This buffer name will normally be set in the global translation 'SmartletConfig', in the Configuration/Scf/Smartlet Helpers folder, but it can be overruled anywhere in your rendering process, in order to automatically select a skin in a subsite for instance.